As someone who loves fonts, paper and graphic design I decided to create my own wedding invites. I looked at stationary companies, online options and ultimately decided I wanted to do it myself. I’m not sure if it saved me money and we definitely know it didn’t save me time, but I was able to truly bring my vision to life. The cost of doing it yourself seems smaller because you are buying pieces here and there, so the expense is more spread out and I probably didn’t do the best job of tracking all the expenses for the little trips to the craft store. But when I first scoped out the cost of doing it myself versus ordering it through a stationary company the cost was significantly cheaper. So before you commit to doing it yourself make sure you’ve thought about the amount of time and effort it will take to create your wedding invites – because that has a cost too!
Inspiration
Before you begin with the crafts spend time searching and pinning the various different wedding invite styles you are drawn to. Identify what you like and what you don’t from your search and once you’ve narrowed down your options, start searching for print at home options. The core of my wedding invite is a print at home kit that I customized to meet my needs. You can make this as easy or as complicated as you like (mine was a little complicated). I fell in love with the Gartner Studios Gold Foil Dots Invite, these beauties were a random find at Staples! I frequent the office supply store (way more than I should!) and knew they carried note cards and some stationary items, but I didn’t think I would find my wedding invites walking through their aisles! At the time the Gartner Studios Gold Foil Dots Invitation set only came with the 5 x 7 printable invite and ivory envelope, but now they offer an entire suite.
The Idea
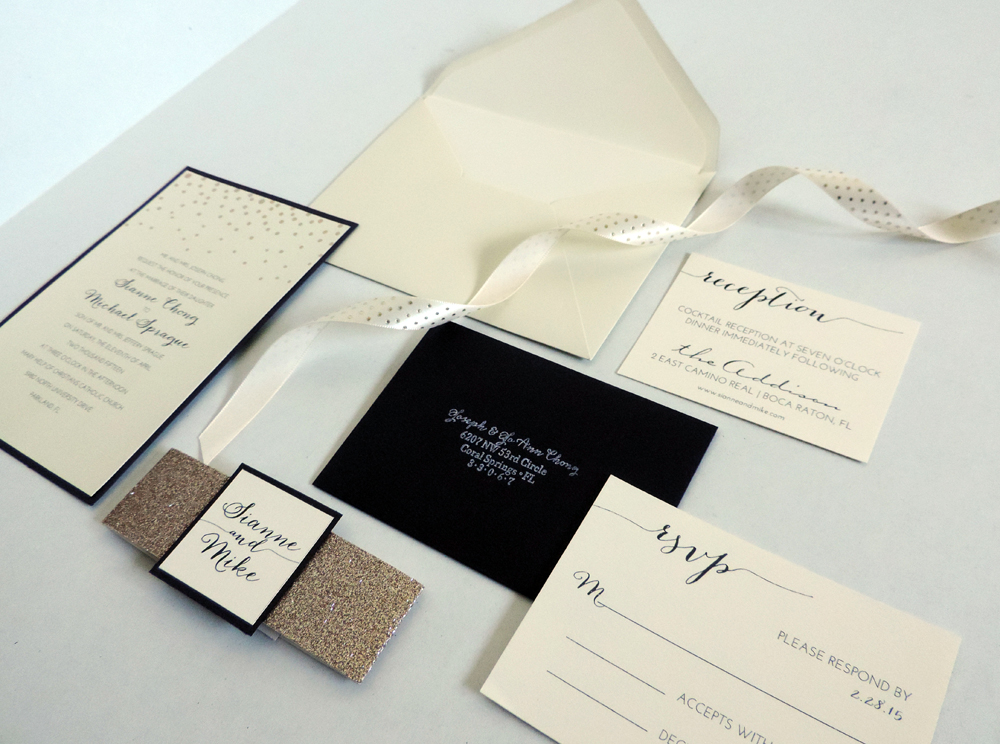
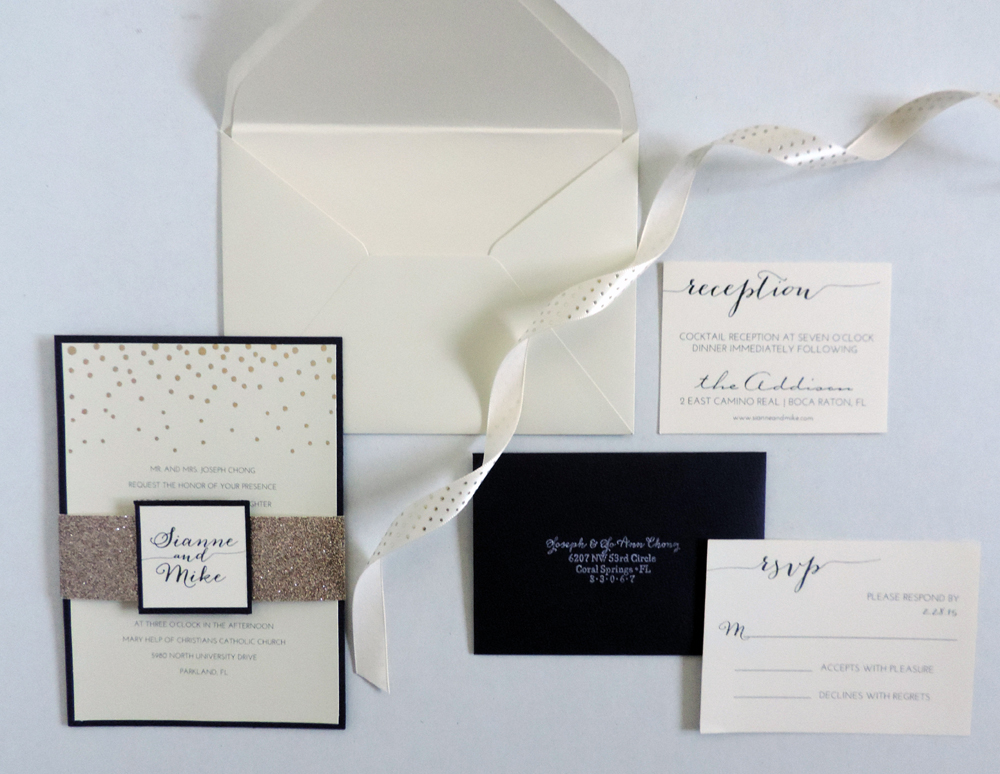
After all my searching and pinning I decided I really liked the layered wedding invites, I thought it brought a pop of color and umph to it. I knew immediately I wanted my design to include a layer. I also wanted to achieve a formal yet whimsical invitation to show the type of wedding we’d be having. After some playing and testing I think I achieved what I was looking for! This was a perfect way to show spring time elegance.
The Products
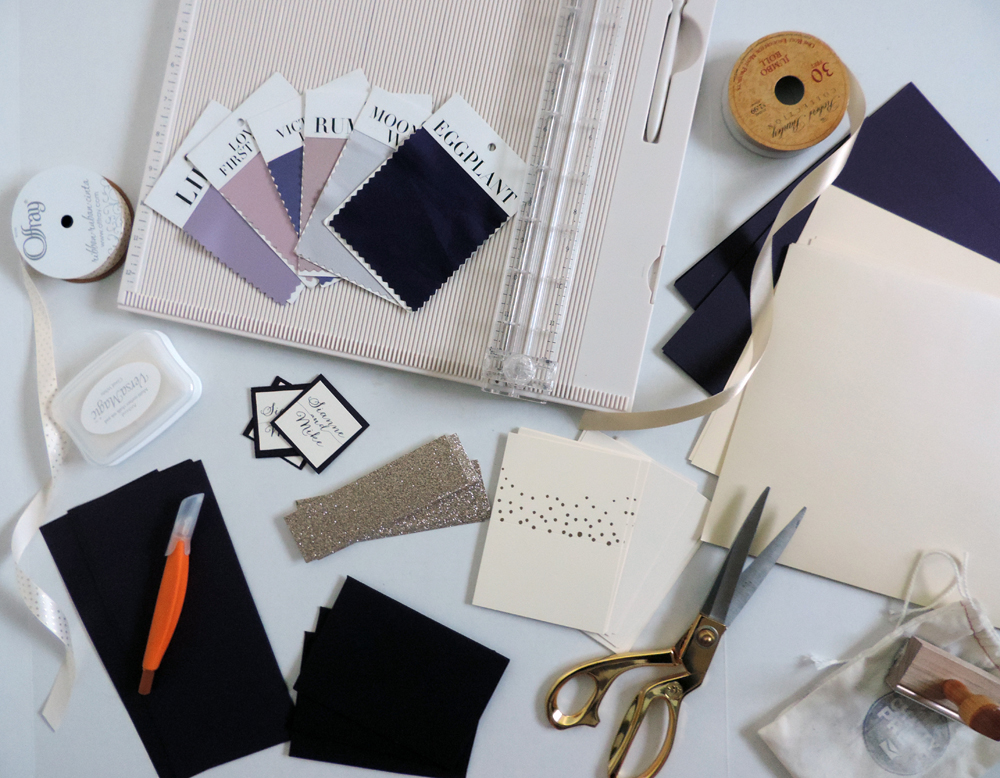
Once I played around with the design, tested various colors, searched the craft stores and online I found the perfect products to make it all happen. Here’s a list of what I purchased to create these wedding invites:
- Gartner Studios Gold Foil Dots Invitations – included the 5×7 printable invite and ivory envelope
- Paper Source 8.5 x 11 Aubergine Cover Weight Paper – this was for the backing of the 5×7 invite to create the two layers as well as the backing for the Sianne & Mike square ontop of the glitter belly band
- Paper Source 4 Bar Aubergine Envelopes – this was for the RSVP cards
- Hobby Lobby 8.5 x 11 Creme Heavyweight Cardstock – this was for the RSVP and Accommodation Cards
- Hobby Lobby 12 x 12in Solid Glitter – Champagne Card Stock by the Paper Studio – this was for the belly bands wrapped around the 5×7 invite
- Staples Stardream Metallic Cover Cardstock – this was for the envelope liners
- Martha Stewart Heavy-Duty Guillotine Paper Trimmer 12″
- Martha Stewart Deluxe Score Board
- Customized Return Address Stamp from Etsy Shop ChattyPress
- Staples Roll-On Glue Tape – BEST THING EVER!!!
- Hot Glue Gun
Remember when I said I’m not sure if this was really cost effective…. You end up buying a lot of odd and end items to make this happen, but I think it was totally worth it!
Putting together the Wedding Invites
Here’s step by step instructions on how I put these bad boys together, there are a few gotchas in here that you have to be aware of before getting started! Be sure to break it up, this is a timely project, it doesn’t need to (and most likely can’t) be done in a day while keeping your sanity!
The Wedding Invite
- Because the envelopes were meant to fit a 5×7 invite, the gold foil dots paper needed to be trimmed down to show the aubergine paper layered behind it
- Before printing on the gold foil dots paper, cut 1/2 in off the bottom and one side. Doing this before printing ensures it will print centered and eliminates having to cut off 1/4 in of paper of either side (which can be a real pain!)
- Design your wedding invite – I created mine with Adobe InDesign using two fonts, Anna Clara and Josefin Sans. If you don’t have Adobe you can create it in Microsoft Word by sizing the document to the size of your paper invite
- Print the invite onto the paper (check the way the printer pulls the paper to make sure it prints on the correct side, I normally mark the top left corner of the paper in the tray to see how it pulls)
- Cut the aubergine paper down to 5×7
- Using the roll-on glue tape adhere the gold foil dots invite to the aubergine backing (I prefer to turnover the invite, roll the glue tape onto the back of that and then flip it over to make sure the two pieces of paper are lined up perfectly) Lower one corner to stick it to the second paper and then use the side of your palm to slowly press and smooth out until both pieces of paper are stuck together – there should be a 1/4 in reveal all around the invite
The Envelope Liners
The Gartner Studios envelopes didn’t have liners in them and I felt strongly about adding them as they provide a nice finishing touch to the entire suite, so I made these myself as well, that is with a little help from my friends!
- Grab an extra sheet of 110 lb cardstock, use this paper to create a template
- Trace the outside of the envelope and cut it down to size – two things to keep in mind here, the liner doesn’t have to be the height of the envelope, I made it just long enough to clear the opening and you’ll have to cut it down to sit below the lining of the flap glue
- Take the template and trace it onto the metallic paper, I was able to fit two to a page, one in each corner
- Start cutting! This is where friends come in very handy! Thanks Marisa and Meghan – you’re the best!
- Once all of them are cut measure where the crease for the flap of the envelope and mark it on each liner, score the liner using the Martha Stewart Score Board to create the fold for the flap
- Keep the stack of envelope liners ready, but don’t adhere them to the envelopes just yet!
The RSVP + Accommodation Cards
I also designed these cards in Adobe InDesign, but this can be done in Word. I created the card to size, saved it and then placed it as an image into an 8.5 x 11 document to maximize the number of cards I could print to a page.
- After you design each of these cards, print them out
- Since Gartner didn’t have the full suite when I was looking for wedding invites, I designed my own and found paper that matched their color from Hobby Lobby
- I printed them out and cut them down to size using the Martha Stewart Guillotine Paper Trimmer, this provides a nice clean cut while doing multiple pages at a time – absolute life saver!
- After cutting them down to size, I sent them through the printer again by doing a simple Word document mail merge for the small numbers on the back of the RSVP card (just in case someone didn’t write their name!) The guest list doesn’t have to match the numbers right now, but they will before you can finish them
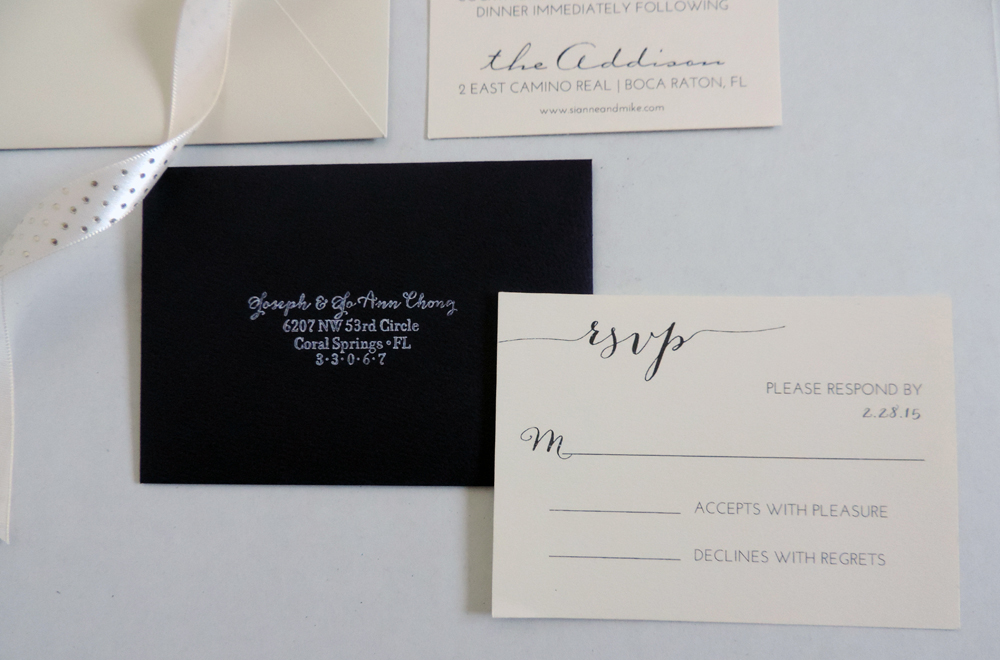
The RSVP Envelopes
To give my invites a pop of color, I used aubergine envelopes. There’s already a few gotchas that I identified above, but the gotcha with these envelopes is that you can’t print white on dark paper with an inkjet or laser printer. So to make this work I was either going to have to write by hand, hire a calligrapher or use a stamp. I purchased a customized stamp through Etsy Shop ChattyPress and used white ink to make these come to life! Just simply start stamping away!
Belly Band
- Cut the glitter paper to size, 12 in x 1.5 in
- Print and cut the name squares to size
- Cut the aubergine paper to 2 x 2 in squares for the name square backing
- Use the roll-on glue tape to adhere the backing and name squares to one another
- Wrap the belly band around just the invite and use a hot glue gun to keep it together (the glue tape won’t work on the glitter paper)
- Hot glue the name square to the front of the belly band
Finishing Touches
Now all you have left to do is print the guests addresses on the envelopes, line the envelopes and insert all of the pieces of the invite into the envelope! Here are the steps in order to make this party easier:
- Do a mail merge in Word and print the envelopes (I used the same fonts on the invite for the addressing)
- Once the mail merge printing is complete, now you can start adhering the liners to the inside of the envelope – through trial and error I quickly realized that it was best to just stick the top half of the liner down with the roll-on glue tape and leave the portion under the crease as is
- On my excel spreadsheet for the guest list I assigned each invitation being sent out with a number, and now that you already have the RSVP cards with the printed numbers on the back stuff the envelopes to match the guests RSVP number – it’s much easier to do this when the envelopes are already printed to simply stuff them at one time like an assembly line (once again friends come in extremely handy for this!)
Now you’re done with your wedding invites! Remember this doesn’t have to get done in a day or a weekend, take your time and spread it out, it makes it way more managable that way! And don’t forget to invite your girls over for wine or bubbly to help this process move a long a bit easier!
Have questions? Ask them in the comments below!